Canine Smart Light Switch
Collaborative project with my apartment-mate Avital for her creative computing class and my experimental interfaces class.
💭 Concept
Having just set up the smart lights in my new apartment, I went about trying to imagine a fun way to use them for my switch. Bouncing ideas off of Avital, she put forth the idea of using her dog, Bug, as a way to trigger a switch. We weren’t exactly sure what the design of the switch would look like, but we dove right into planning.
🤖 Planning the Electronics/Programming
First step was making sure that the tech stack would work throughout all the different hops that data would have to take to get to the end result of changing smart lights. To be precise, this arrangement would require a physical switch connected to microcontroller that sends data to a Node server on my computer that queries the smart lights’ API to change color. First I accumulated all the different libraries we’d need to get it to work. We’ll need Johnny-Five (http://johnny-five.io/) to manage the microcontroller logic/handle state changes and its corresponding Particle IO library (https://github.com/rwaldron/particle-io) to connect wirelessly to the Particle Photon microcontroller.
(Side note: I still swear by using Javascript and Johnny Five over traditional Arduino C programming, especially for even mildly complex multi-modal projects. Event-based asynchronous Javascript programming of microcontrollers is a lot easier to plan, read, and debug— especially with J5’s beginner-friendly syntax)
We’d also need a LiFX API wrapper if we wanted to avoid writing a thousand different GET/PUSH requests to the standard LiFX REST API. After going through a half dozens projects in various states of abandonment, I decided on LiFX-HTTP-API (https://github.com/klarstil/lifx-http-api) as it seems to be the best equipped for queries outside the local network and the least abandoned of the lot.
The physical electronics themselves are very simple- a wireless microcontroller, a battery bank, and a single circuit that completes when two pieces of copper tape touch (with a 1kΩ resistor to ground it.)
The code was similarly a simple endeavor. It just needed to initialize all the disparate libraries then receive a couple events and fire off a couple API calls.
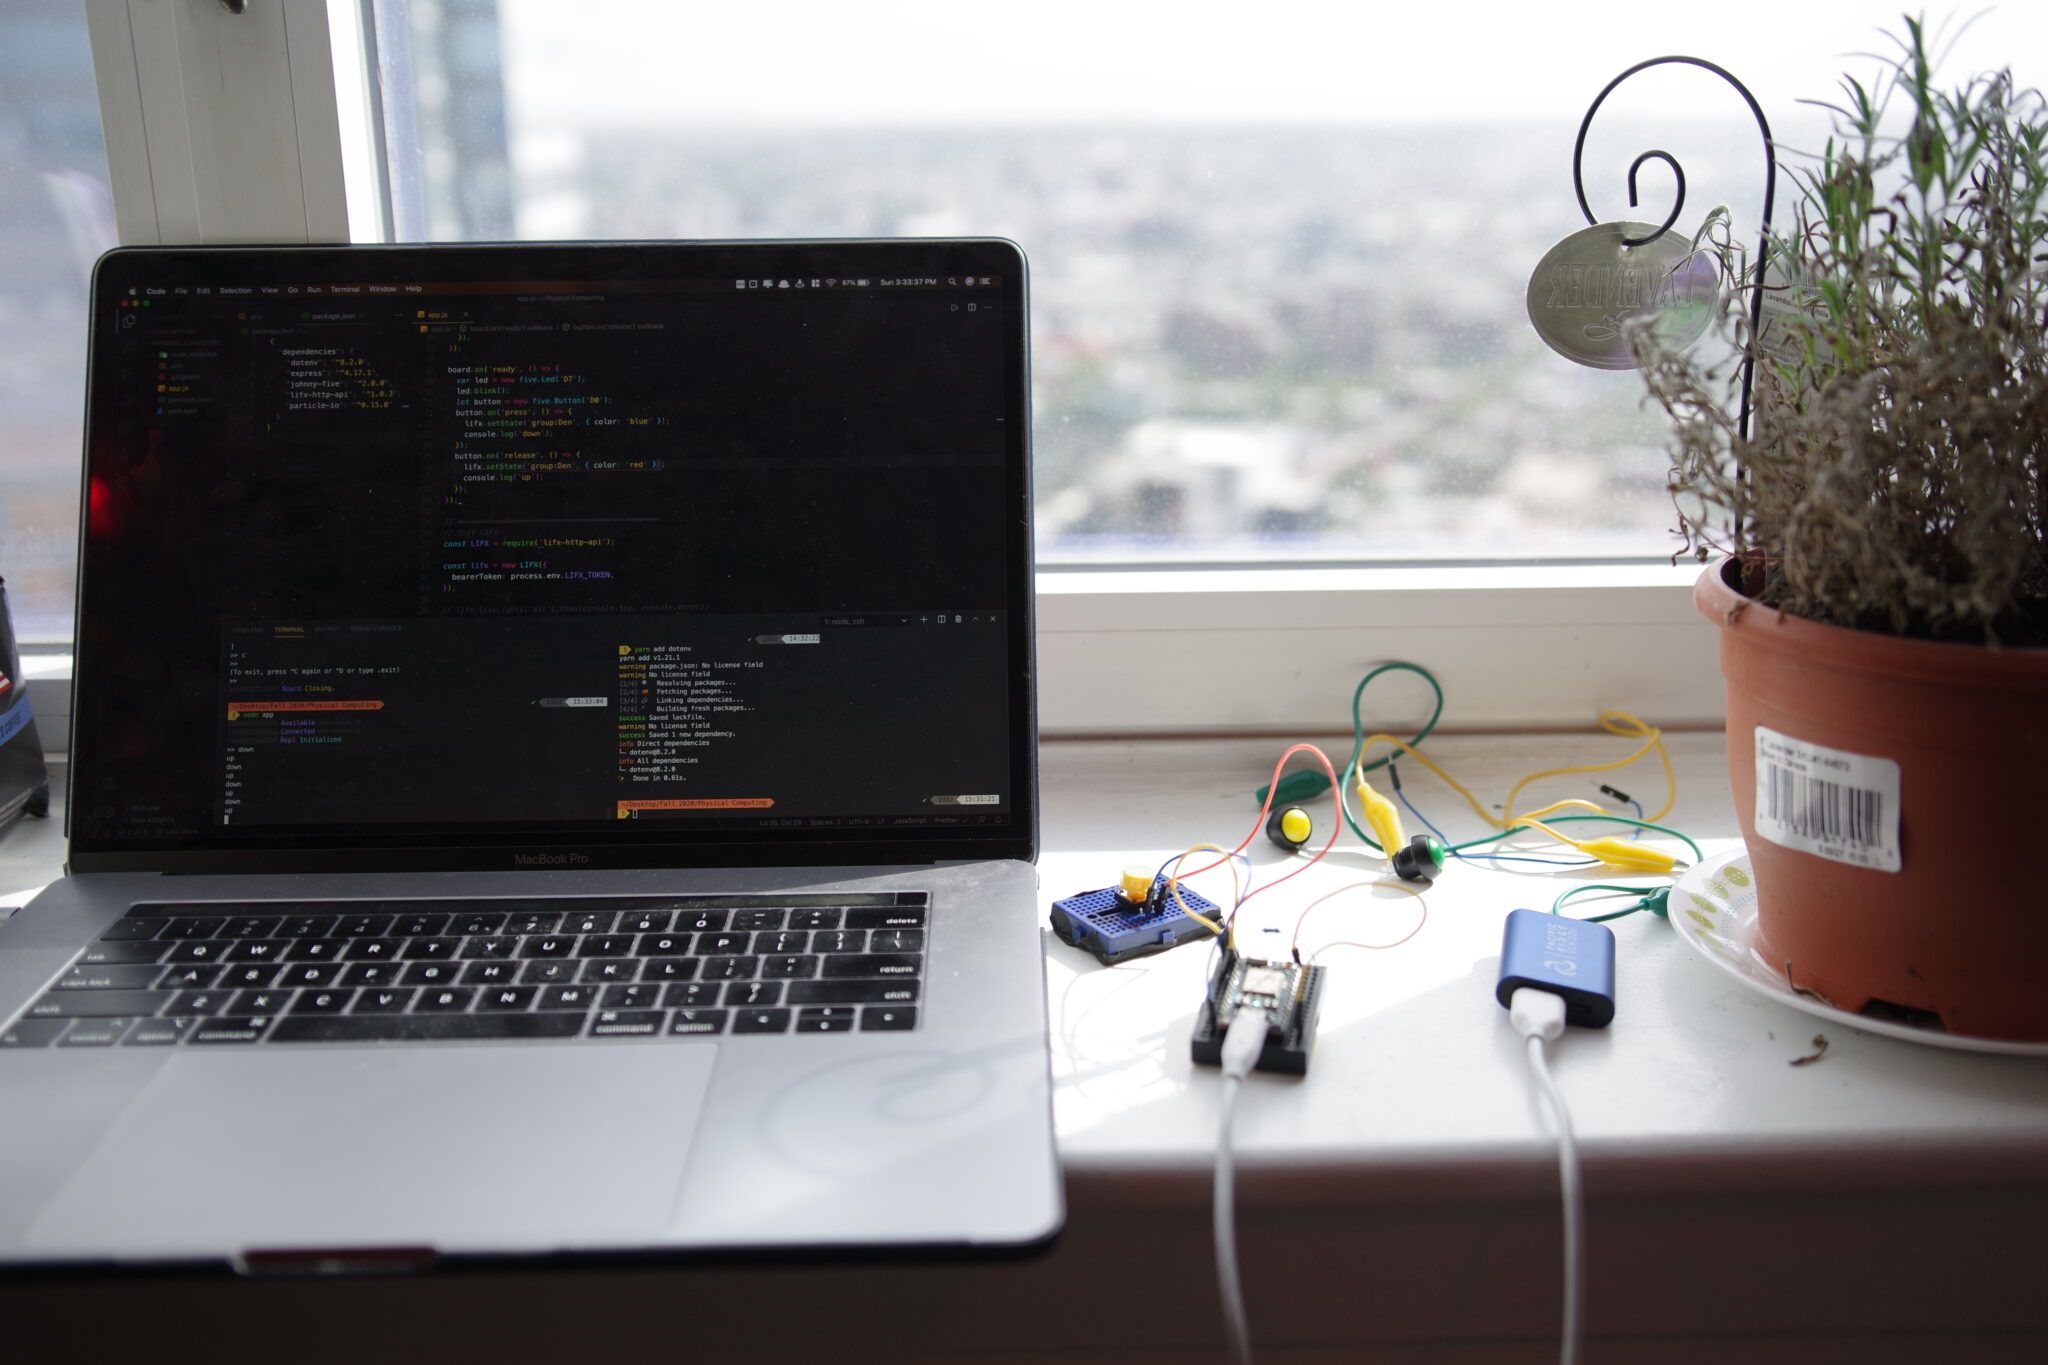
The early prototype arrangement to test the tech stack
We put together a basic test platform- a normal button connected to the Photon, that when pressed sends an event to the local Node server that triggers the lights to shift from red to blue, then back to red when released. We tested it out and:
🎉 Success!! 🎉
Now that the code was in nearly its final form, I can demonstrate how it works. Skipping library imports, the first block of code instantiates the J5 board, and declares it to be a Particle board with a certain API token and device ID so J5 can handle all the complex authentication and server connections.

const board = new FIVE.Board({
  io: new PARTICLE({
    token: process.env.PARTICLE_TOKEN,
    deviceId: process.env.PARTICLE_DEVICE_ID,
}),
For anyone who doesn’t know, we’re using environment variables to hide my secret API tokens from being visible in the code and being publicly published to Github.
Things are a similar story for the LiFX HTTP Wrapper, where we’re declaring it and initializing it with an API token.
const lifx = new LIFX({
  bearerToken: process.env.LIFX_TOKEN,
});
Now getting into the meat of the code, we’re listening for an event when the board is connected and ready to receive/send signals (similar to jQuery), then declaring a new button class instance assigned to watching the 0th digital port of the microcontroller. This’ll allow us to easily trigger events off of it in the next step.
board.on('ready', () => {
  const pressureSwitch = new FIVE.Button('D0');
...
});
The final part now! the central logic of the script. We’re using functions built into J5’s button class to detect when the circuit is ‘pressed’ (complete) or ‘released’ (broken), then setting the smart light group for the room (den) to a given color.
pressureSwitch.on('press', () => {
    lifx.setState('group:Den', { color: 'green' });
});
pressureSwitch.on('release', () => {
    lifx.setState('group:Den', { color: 'kelvin:4000' });
});
So altogether, the full server code is:
// Library Imports
const DOTENV = require('dotenv');
const LIFX = require('lifx-http-api');
const FIVE = require('johnny-five');
const PARTICLE = require('particle-io');
const fs = require('fs');

// =================================================
// Initializations
// Init environmental variables
DOTENV.config();

// Init Johnny Five
// Setup remote Particle Photon connection
const board = new FIVE.Board({
  io: new PARTICLE({
    token: process.env.PARTICLE_TOKEN,
    deviceId: process.env.PARTICLE_DEVICE_ID,
  }),
});

// Init LIFX API wrapper
const lifx = new LIFX({
  bearerToken: process.env.LIFX_TOKEN,
});

// =================================================
// Server logic
board.on('ready', () => {
  // Setup button for switch
  const pressureSwitch = new FIVE.Button('D0');
  // When pressure switch is down (circuit complete)
  pressureSwitch.on('press', () => {
    // Set color to blue
    lifx.setState('group:Den', { color: 'green' });
  });
  // When pressure switch is up (circuit broken)
  pressureSwitch.on('release', () => {
    // Set color to red
    lifx.setState('group:Den', { color: 'kelvin:4000' });
  });
});
Now on to the planning of the physical switch…
🔨 Prototyping the Switch
We reasonably quickly settled on the idea of using some kind of pressure plate on Bug’s dog bed or on the floor that could be compressed when he sits on top of it. The major point of discussion and debate was the method by which the pressure plate would be constructed, especially respective of the ‘spring’ like mechanism that it’d need.
Not having actual springs to use, we first settled on using zip ties as compressive spring-analogues that would bend with Bug’s weight. We set about prototyping such a solution:
Assembled Components
Unassembled components
Not the most elegant and aesthetic of solutions, but hopefully one that would work well. Next was to connect some copper tape to the bottoms and tops of the ties, and see if it works!
Quite some time and a pleasant dollar pizza break on the rooftop later, we finally got around to testing the contraption:
Unfortunately a temporary setback…
After a bit more toying around, we realized that the zipties and masking tape were too prone to being forced sideways, and too stiff to act as effective springs. So it was back to the drawing board for another solution!
Looking around at some of the cardboard boxes scattered about our recently-moved-into apartment, we happened upon a little accordion-like piece that used to house glasses. Seeing its ability to compress like a spring with a force put upon one of the corners, we cut a part of the box out and stuck it to the bottom of the cardboard plate, attaching copper tape and alligator clips to the inside edges
And it worked! 🎉🎊 Now for the final result!